Slack is a remarkable tool. Its success is recognized globally, and its popularity continues to grow to this day.
Apart from its intuitive design and game-like structure, it offers much more than just a traditional chat tool. Powered by reactions, easy link embedding, mentions, groups, threads, and much more, it offers a complete communication experience.
For those who still seek more, there is always the option of extending Slack's native functionality; either by installing an app or integration from Slack's Public Directory or by creating your own.
If you happen to be that person who still is not satisfied by what's offered "out of the box", you might start to wonder how difficult it would be to create your own Slack integration or app. The answer to that varies; it could be either very difficult or quite easy, depending on what steps you choose to take.
On its own, Slack does not support any services other than their APIs. There are several: the Web API, Events API, RTM API, and Conversation API. We will focus on the Web API for now.
The Web API allows for interaction with most of the built-in functionalities of Slack. You can, for example, get information on channels, users, or chat messages. You can also create new channels and post messages directly to users or in channels. That is just a fraction of the possibilities the Web API provides. For full and up-to-date list, I direct you to the official documentation https://api.slack.com/web.
But the Slack APIs' main purpose is to handle outside requests to Slack. What about another way of communication? Is Slack capable of interacting with external services? Yes, it is, and for that purpose, there is a set of tools you will most likely need to use in any of the apps or integrations you might want to create.
To initiate communication with the outside world from the Slack chat, you can use slash commands, interactive components, events, bots, and links. All of them would need a dedicated blog post explaining their usage, but in this article, we will focus on slash commands. Using slash command combined with the Web API makes for a complete integration or app, and it requires the least amount of configuration and coding.
The Code
To demonstrate how quickly it is possible to create a slack integration, we will pick the easiest components to build with. Slash commands are designed to be accessible from anywhere in the chat area in Slack. You can run them in a channel, group, or direct message. Each slash command starts with a / and is followed by a command name. Optionally, it might take one argument, which is the text you provide after the command name with a single space in between. For example:
/my-command some text
There is a single action done each time you activate a slash command, and that is sending a request to an outside web service. You need to specify an URL (https) when you configure your custom command.
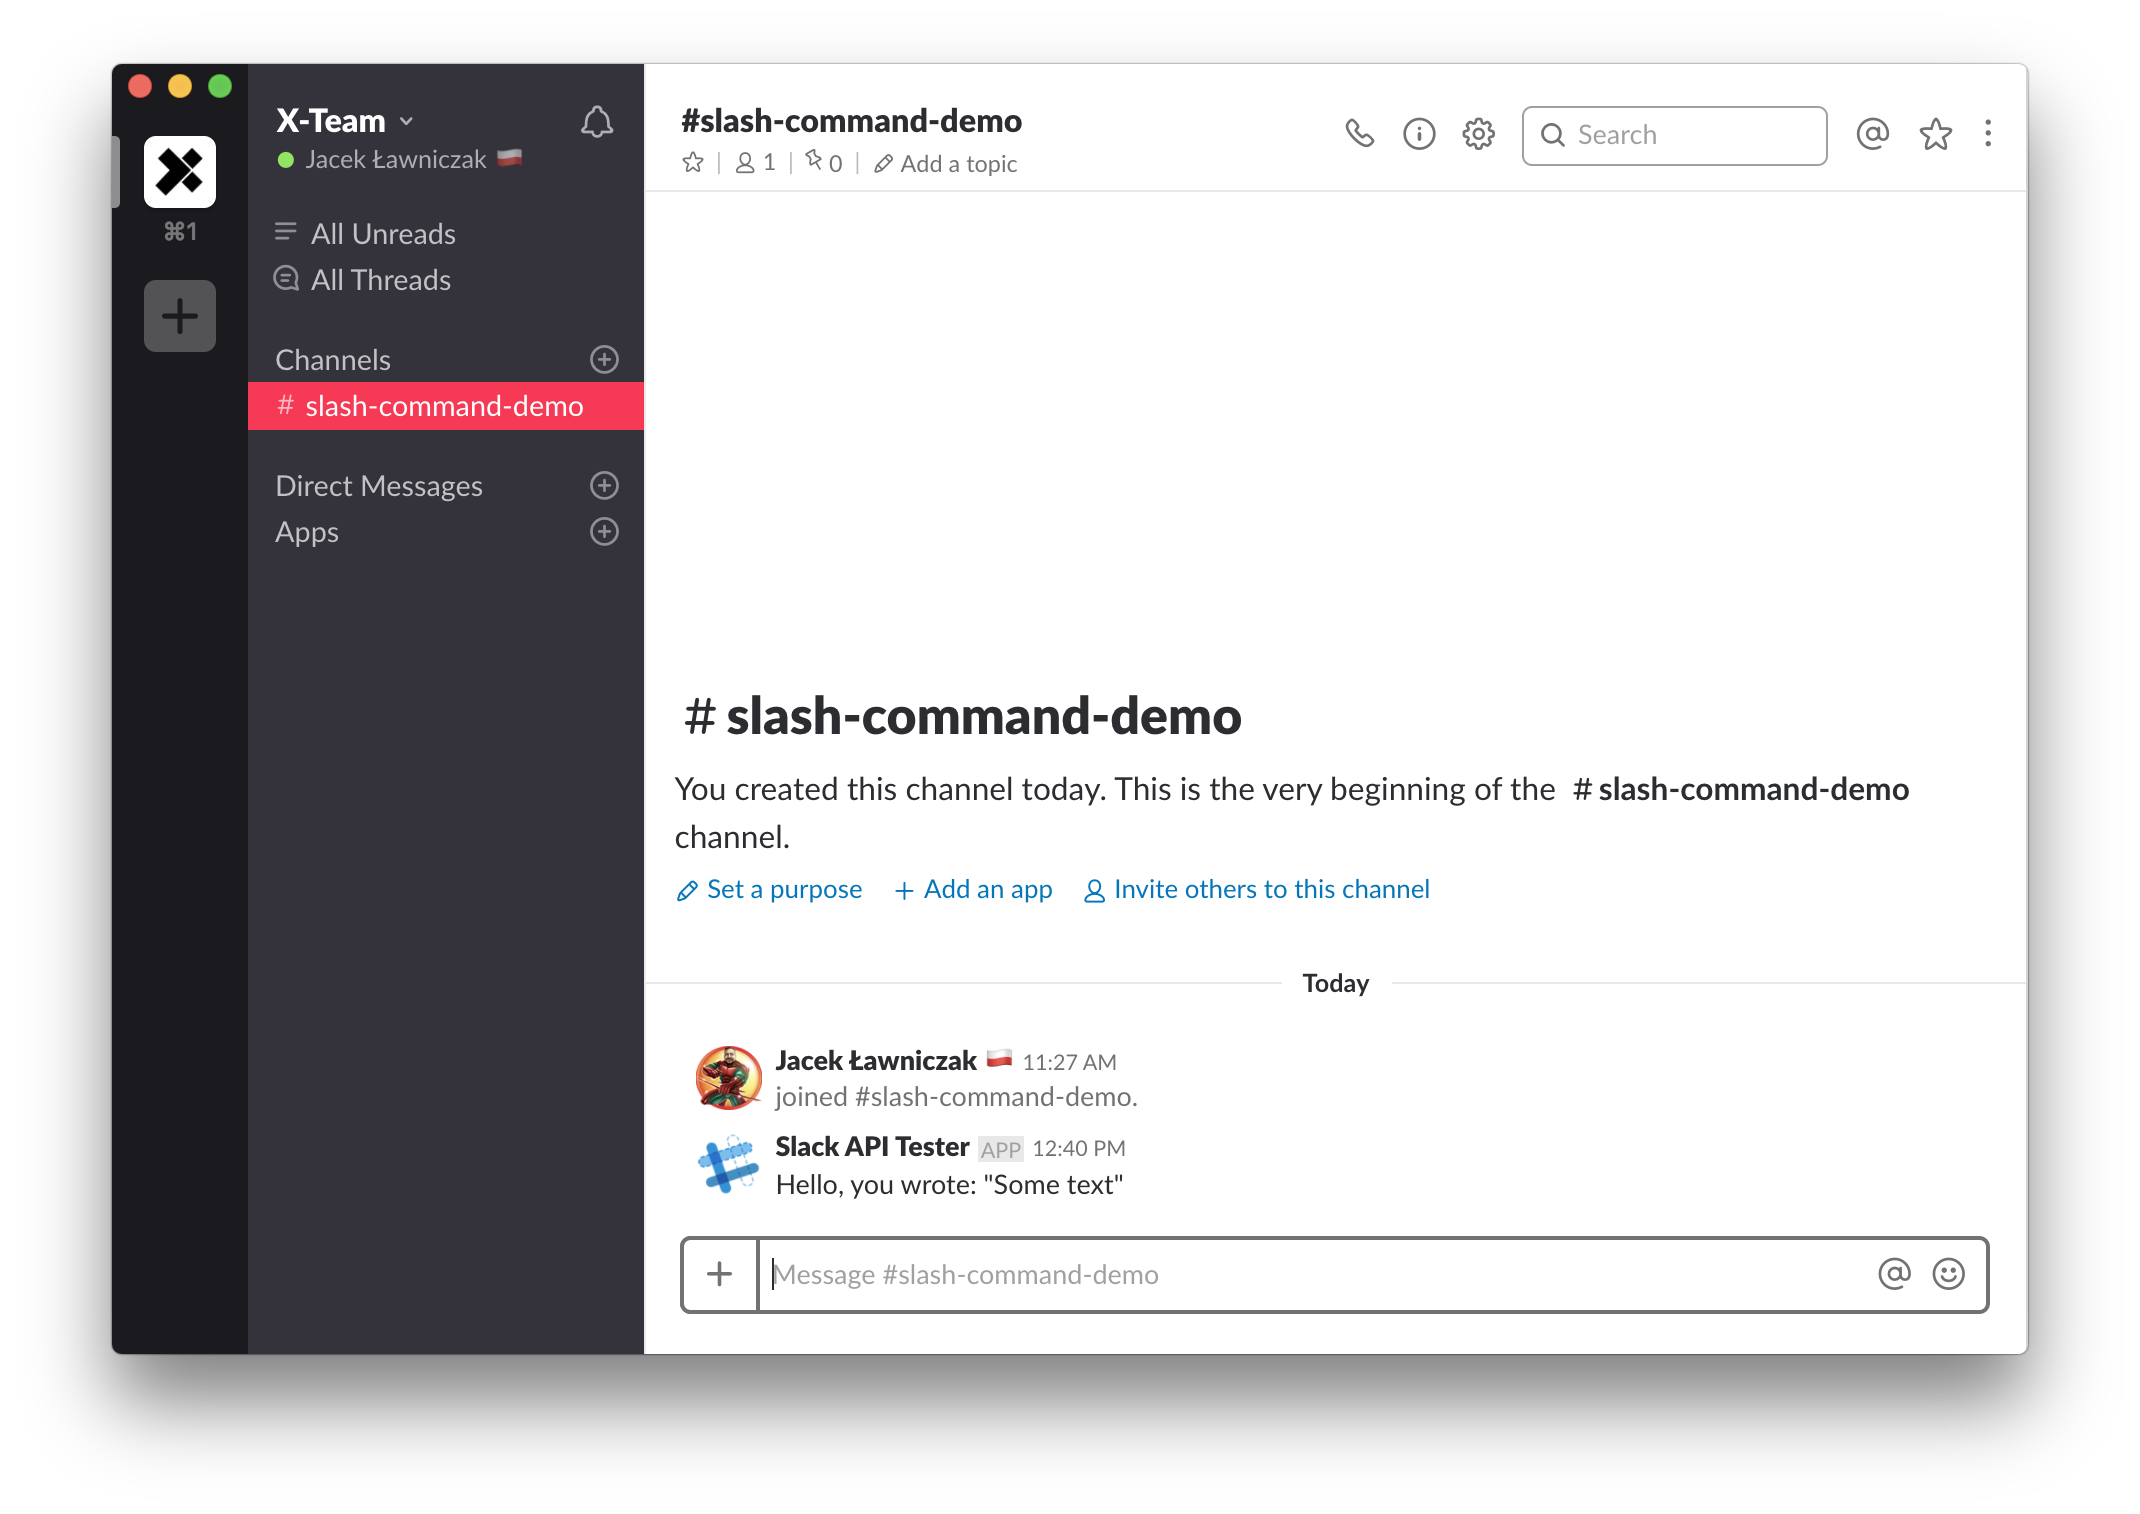
We will prepare a simple slash command which will send back a chat message with the text provided as the command's parameter. So looking at above code example, after running that command, I would expect to get back a public response in the same channel saying: Hello, you wrote: "some text".
Let's talk about the required infrastructure for such an integration. If we look at this step by step, there are some actions taking place in the public domain and some secretly, "under the hood".
- We run a slash command with a text parameter
- Slack picks up that action and forms a request payload to the specified external web service
- The web service (which is outside of the Slack platform) receives the request and handles it on its own
- The web service sends a request to the Web API's endpoint
- The Web API validates and authenticates the request from the web service
- The Web API sends a chat message to the Slack team's chat channel, which is visible to all channel participants
As we can see, in such case we have the Slack platform, and we have the web service part, which is not provided by Slack. The web service we will either have to provide on our own or use some of the available services. I will explain a complete setup using Node.js and Express.js libraries for the web service in another blog post, but since we are aiming to configure this in 3 minutes, we will have to pick something much simpler.
We will place the web service in https://webtask.io and here is why:
- It has an online editor ready to use right away
- It's free for what we want to achieve
- You can sign up using your social media/work account in no time
- It provides an https:// endpoint out of the box (required for slack)
- It works really fast
As opposed to Zapier or IFTTT, which are also very quick to set up, this approach allows you to run your own code the same way as you would on your own machine. To demonstrate that, I will show in a later post the same code running in a local setup.
To get the expected behavior from our integration, you will need to do these steps:
Start with Webtask to get your web service URL:
- Go to https://webtask.io/
- Click "Create a new One" to create new Webtask
- Create an Empty Webtask Function with your custom name
- Copy the https endpoint generated in the footer
Let's switch to the Slack configuration and wrap all configurations before coding:
- You will need to be logged into your Slack team
- Go to https://
.slack.com/apps/manage/custom-integrations - Click the "Slash Command" and then "Add Configuration" buttons
- Select a name for your slash command and click the button below
- Change "Method" to "GET"
- You can close the "Outgoing Payload and Responses" section as it's not relevant at this point
- Paste in the URL you copied from the Webtask editor
- Save the "Token" for later
- Head over to "Autocomplete help text", select the checkbox, and add your description and usage hint
- Click "Save Integration"
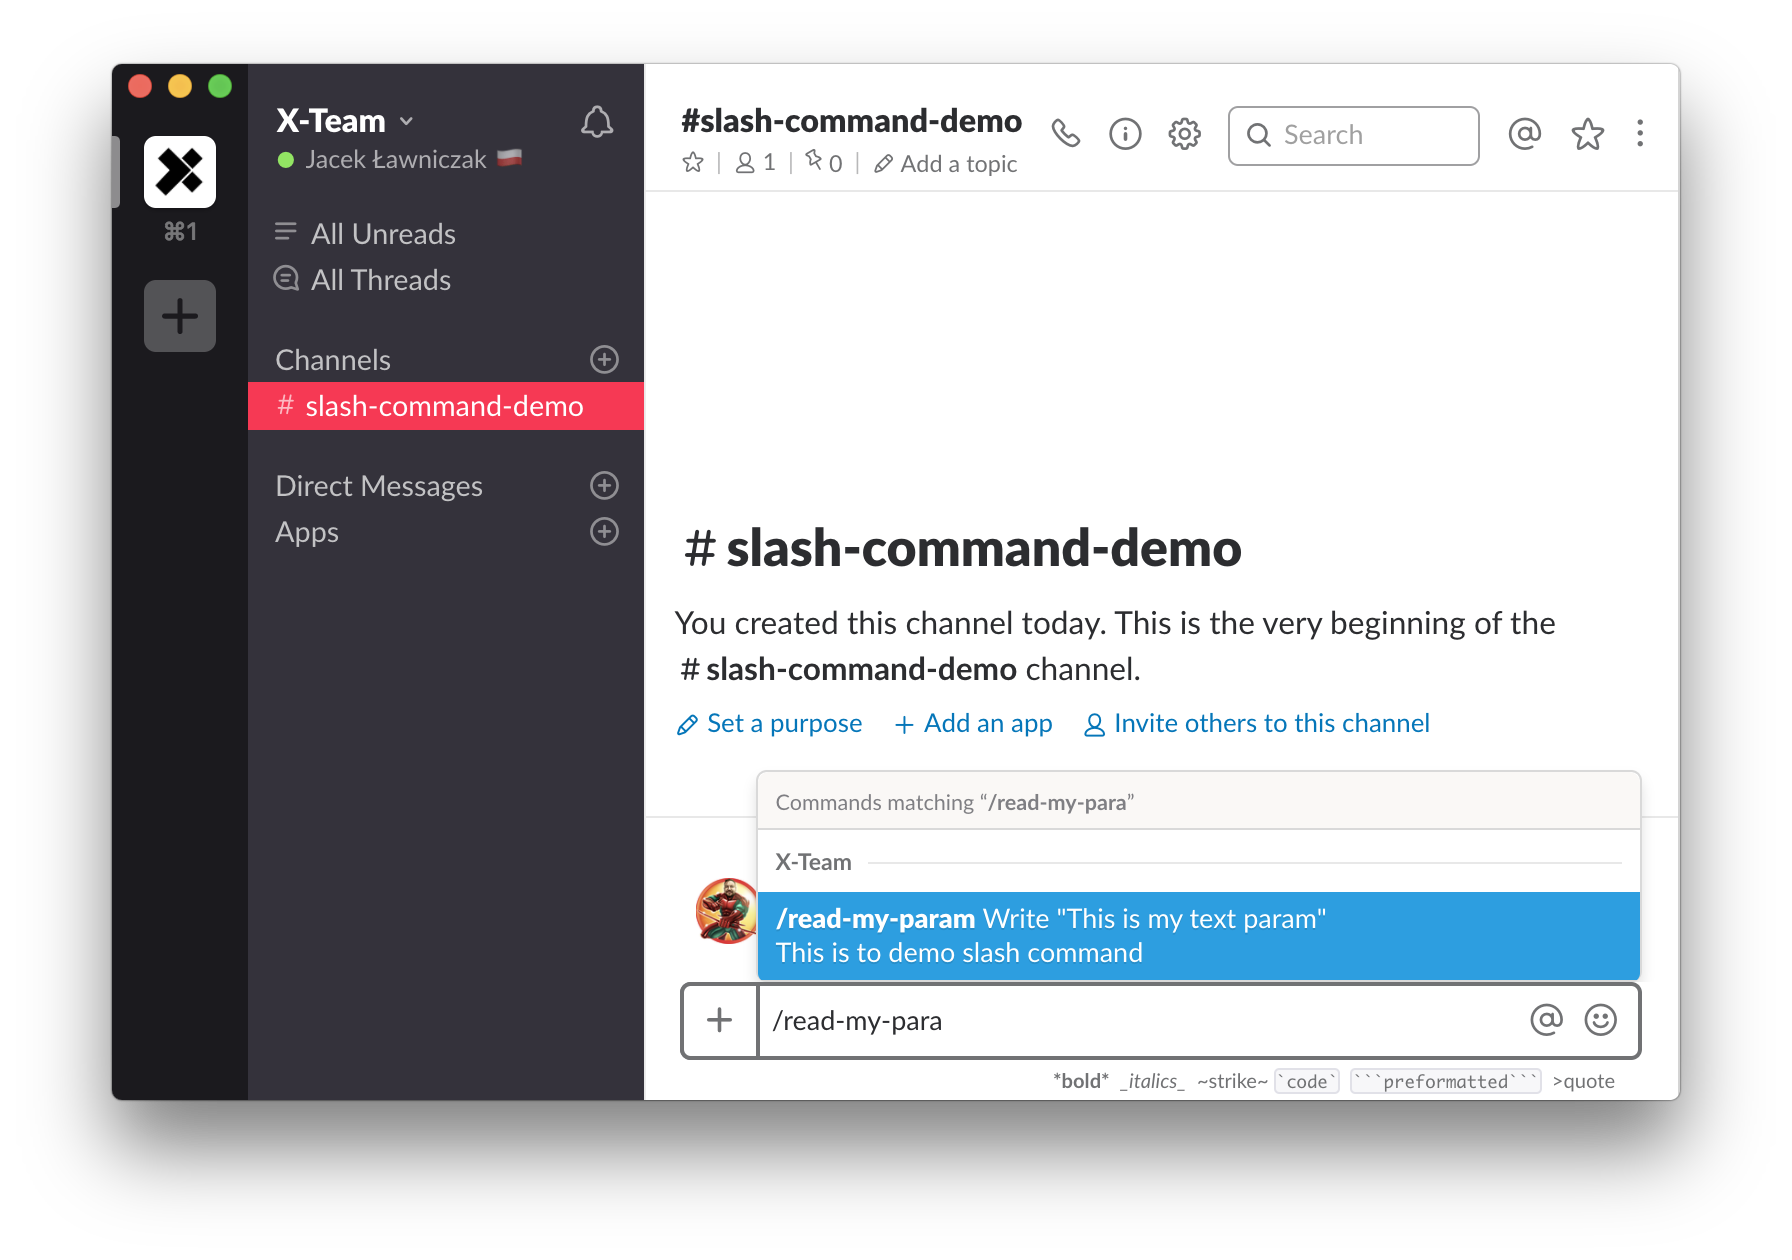
Checking the "Autocomplete help text" adds your new command to a very helpful list of commands that is shown when you start typing any command:

We will need to generate a token to access and authorize our Web API Request. With that token, the Web API will validate your request, check scopes and permissions, and most importantly, it will use it to identify your Slack team — after all, you are posting to a public API route. To set this up:
- Go to https://api.slack.com/custom-integrations/legacy-tokens
- Create a legacy token and save it for later
You might wonder about the "Legacy" part in the custom integrations section and tokens. We are in fact using a legacy functionality of Slack which may sooner or later be deprecated. For now, it's still active, and it is the easiest way to configure a simple integration. In a future post, I will show the "correct" way of configuring a Slack app which uses a slash command. In that case, we will need to deal with some more complicated configuration, but having gone through the initial legacy setup, you will have a better understanding of the process.
Running the command
Now, out of the box, when you run this command, Slack will print out whatever is in the response text from the endpoint and show it to the user that triggered the command as an "ephemeral message". This type of messages is only visible to the user who triggered them and will only exist in the current channel window until a refresh or log out. It is handy for some of the interactions and debugging but it's not what we are going for in this example.
Let's replace the existing code with what we would like to use for this example:
var Webtask = require('webtask-tools')
var express = require('express')
var bodyParser = require('body-parser')
var request = require('request')

var app = express()

app.use(bodyParser.json())
app.get('/', function (req, res) {
  var headers = {
    'Content-Type': 'application/json',
    'Authorization': 'Bearer ' + req.webtaskContext.secrets.token
  }

  var options = {
    uri: "https://slack.com/api/chat.postMessage",
    method: 'POST',
    headers: headers,
    json: true,
    body: {
  text: `Hello, you wrote: "${req.query.text}"`,
      channel: req.query.channel_id
}
  }

  request(options)
  res.sendStatus(200)
})

module.exports = Webtask.fromExpress(app)
As you can see, we specified several NPM packages we require to run this code. You will need to add them manually using the Settings icon in the top left corner of the editor under the "NPM Modules" section. Using that tool, add "webtask-tools", "express", "body-parser", and "request" packages.
We also need to use the API Token granted by Slack to access the Web API. Webtask allows you to create a Secret, which is a simple env variable, which they call a "Context variable". We need to go to Settings and "Secrets" where you can add the "token" secret with the value of your granted token. It will be available in the function code under req.webtaskContext.secrets.token.
Security
As you may remember, there was another token generated when we created our slash command. You can add it as a second secret and call it the verification_token. Then, you can add a simple check for request verification to prevent unwanted usage of the script:
(...)

app.get('/', function (req, res) {

/* insert code below /*
if (req.query.token !== req.webtaskContext.secrets.verification_token) {
  res.sendStatus(401);
  return;
}
/* end */

(...)
The token value generated on the slash command config page (which can be regenerated as needed) is sent with each request from Slack. That way, you know it's slack and not someone else trying to abuse your web service.
You can save your progress and run the command in Slack chat.

With this setup, you can try using more complicated packages and services as well as other Web API methods, too. Good luck!


